The lower body is crucial for everyday and effective usage of our entire bodies, and if we don’t exercise and care for it, we’re missing out. As a result, this calisthenics leg workout is only focused on the lower body. Many of the show-stopping calisthenics moves, such as handstands, human flags, and muscle-ups, demand a lot of upper body power, but what about the lower body?
According to their explanation, the basic principle of calisthenics is to use bodyweight and gravity to produce resistance for training. When this exercise is focused on the legs, testosterone is produced, which aids in muscle development and fat reduction, as well as injury prevention and increased physical strength.
Lifting weights isn’t the only way to gain strength and muscle, even on leg day. Calisthenics exercise is an excellent approach to increase whole-body strength.
These athletes have included a few calisthenics leg routines that have shown to be the most beneficial for them below:
1. Classic Bodyweight Squat
The traditional bodyweight squat is unquestionably the most fundamental strength-building exercise for the legs, hitting all of the muscles in your lower body while also posing a mobility challenge.
Working your way up to 40-50 consecutive bodyweight squats will provide you a great foundation on which to build your lower body strength.
2. Walking Lunge
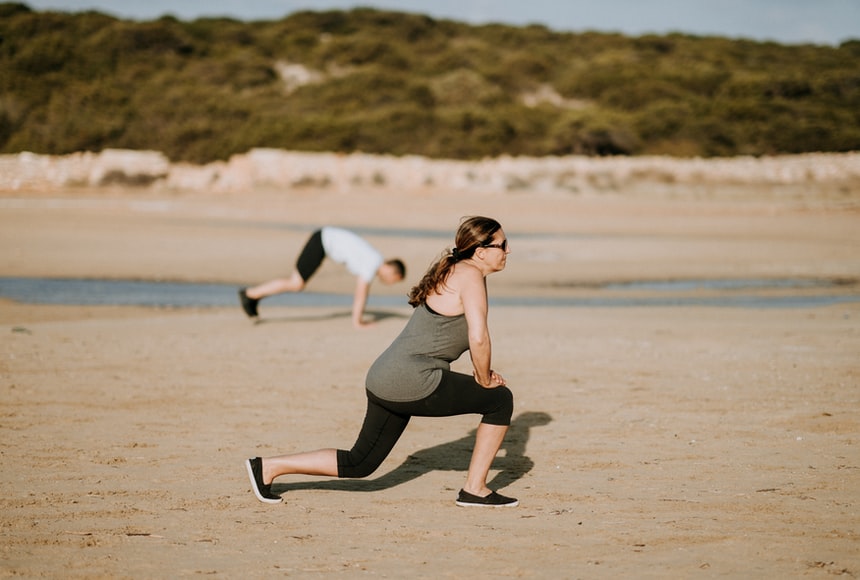
The walking lunge needs a little more body awareness than the traditional squat. It also has a balancing component and is an excellent method to target your leg muscles from various angles. Bodyweight squats go well with walking lunges.
3. Archer Squat
This asymmetrical squat variant combines strength, flexibility, balance, and control beautifully.
It’s also a good method to strengthen your inner thighs and may be used as a warm-up for one-legged squats. This technique is also known as a “cossack squat” or a “side-to-side squat,” but whichever name you give it, it’s a terrific lower-body workout.
4. One Leg Box Squat
Single leg squats are easiest to learn if you have a box, bench, or another item beneath you. Beginners frequently lose their balance at the bottom of a one-legged squat.
When a result, as you develop the power and control to complete a freestanding, unaided one-leg squat, the box may provide safety and support.
5. Hover Lunge
This is similar to a lunge, but with your back foot floating in mid-air. To keep balanced while on one leg, you’ll need to lean forward a little more than in a conventional lunge.
Balance can also be improved by reaching both arms forward. To avoid any stress on your back knee, make sure you lower yourself down slowly and steadily, especially in the final few inches.
6. Free Squats
Bend your knees and tilt your hips backward to get into a sitting position with your feet slightly apart and your back straight. Extend your arms forward at the same moment. Make sure your heels stay on the ground.
Return to a standing position and lower your arms. Quadriceps, hamstrings, and glutes are the primary muscles targeted during free squats. When completing this exercise, however, core strength and stability, ankle mobility, back muscles, and calves all play a part.
7. Pistol Squats
Standing with both feet together is a good idea. Extend your left leg forward until it is completely straight and the heel is slightly above the ground.
Raise your arms in the air in front of you. Maintain a firm core and a straight spine. Now, while extending your left leg, bend your right knee and lower your body.
8. Box Jumps
Choose a box that is the right height for you. It should be placed in front of you, but not more than two feet away. To build momentum, swing your arms back and forth and jump off the ground at the same time.
Land with your knees bent on top of the box, then straighten up. Step off the box one leg at a time or softly jump back down. The glutes, quadriceps, calves, and hamstrings are all strengthened with this plyometric workout. It increases your heart rate, which helps you burn calories, while also making you quicker, more powerful, more explosive.
9. Spanish Squats
This workout will need the use of a resistance band. Make two loops for the legs and tie one end to a fixed post. These loops should be placed immediately below your knee.
Take a step backward until you feel a kink in the band. Tilt your hips rearward while bending your knees, like you would in a conventional squat. Slowly return to a standing position after lowering your hips to almost 90 degrees.
Spanish squats allow you to focus your quadriceps with a higher weight while avoiding knee damage. Squatting with the bands improves stability, which exercises the core.
10. Side Squats
Your feet should be somewhat broader than your hips. Straighten your arms in front of you. Shift your weight to your right heel, pull your hips back, and bend your right knee.
Make sure that your left leg is completely straight. Return to your original location. Rep, this time transferring your weight to your left heel, bending your left knee, and extending your right leg.
To increase the difficulty, wear a resistance band around your ankles or add weights. Squats to the side work your quads.
11. Sissy Squats
This variant differs from standard squats. Begin by pressing your knees forward, raising your heels, and bending backward while keeping your feet together.
From head to knees, your body must be in a straight line. Before returning to the upright posture, try to lower your knees as low as possible in a controlled movement. This workout is not suitable for people who have knee issues. Beginners can begin by grabbing a rail or a post for support.
12. Glute Bridges
Lie down on your back with your feet flat on the ground. Kneel on the ground with your feet flat. Lift your hips off the ground by engaging your core.
Maintain a straight and flat side to side position with your hands. Return to the starting position by holding your stance for a second. Hip and core muscles are worked using glute bridges.
The following exercises, however, are the most widely accepted for increasing strength and muscle mass – and that is the whole objective of this list. They’re listed in roughly descending order of difficulty.
We hope you enjoyed this calisthenics leg workout; if you think your friends would appreciate it, please share it with them.