During the lockdown and even now that the world is gradually adapting to the new normal calisthenics has proven to be an effective and convenient alternative to the gym and outdoor workouts. Experts have been conducting online fitness classes for those who want to stay in shape especially now that COVID-19 continues to mutate and other diseases threaten the health of the people not only locally but internationally.
Calisthenics or bodyweight exercises can be a good addition to your daily fitness routine, even if you’ve already tried yoga and other types of exercise. Calisthenics exercises, such as push-ups, crunches, sit-ups, and pull-ups, are a great way to strengthen your core muscles. Flexibility, endurance, and mobility are all aided by a well-developed core.
There are several types of calisthenics exercises but today we will focus on core strengthening exercises. The muscles of the spine, abdomen, and pelvis are strengthened through the use of core exercises. All physical activity is supported by these muscles. On the field or in daily life, this improves one’s sense of equilibrium and steadiness. In fact, a strong core is essential to nearly every physical activity.
A core exercise is one that requires you to use your abdominal and back muscles in unison. The core muscles can be trained and strengthened, for example, by using free weights in a way that requires you to maintain a stable trunk.
Beginners Challenge
During a calisthenics workout at home, you can choose between two methods, the circuit, and the set and reps. The first method aims to build your endurance by completing a series of exercises in rapid succession.
While the goal of sets and reps is to do as many repetitions or seconds of each exercise as possible.
Here are the different core strengthening exercises.
Plank
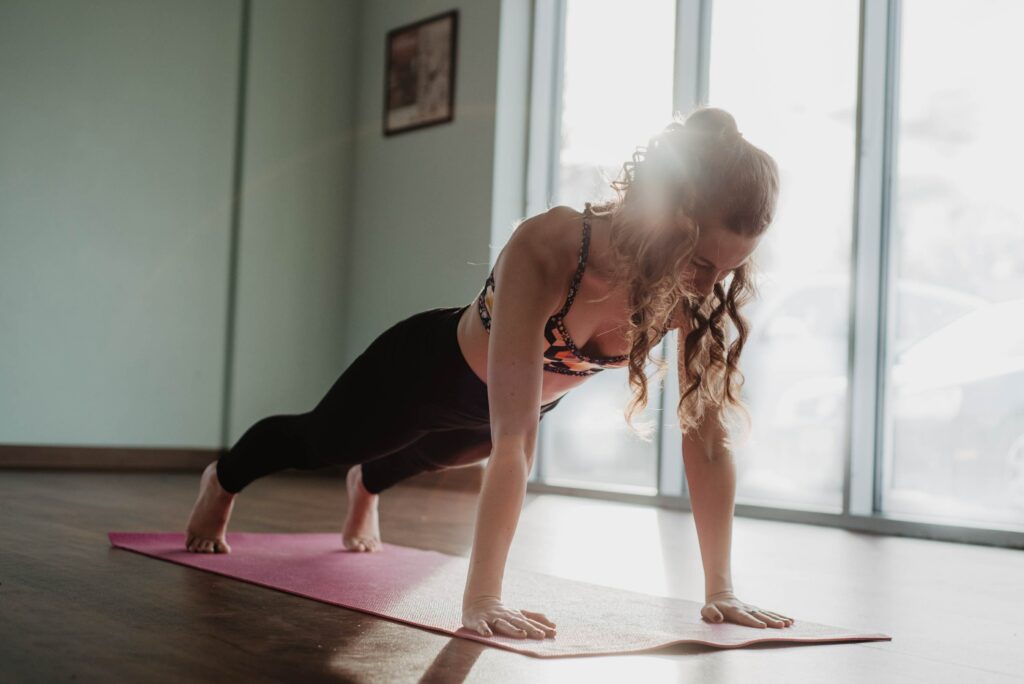
The plank is an excellent place to begin your core-strengthening journey. With little movement, this exercise can be modified to be harder or easier depending on how you feel. The plank is a versatile and efficient bodyweight exercise that can be done virtually anywhere.
Support your lower body on your forearms, and legs behind you, and keep your back straight and low for as long as possible. Start holding for longer periods of time as your core strength improves.
Bird-Dog Crunch
You cannot develop stronger abs overnight. You must first understand how to activate your core. For this vital core exercise for beginners, you must begin on all fours with your hands directly under your shoulders and your hips in line with your knees. This is the beginning position. Raise your right hand and stretch your arm straight out in front of you, maintaining shoulder height, as you simultaneously raise your left leg and extend it straight behind you.
From your right fingertips to your left toes, your entire body should be in a straight line. Under your tummy, bring your left leg to contact your right elbow. Repeat your leg and arm extension. Retain the initial position. Continue on the reverse side. Perform five reps per side.
Standing Bicycle Crunches
Standing bicycle crunches, also known as standing criss-cross exercise, is a more functional variation of traditional bicycle crunches which, by the way, have been shown to be 248% more effective than standard crunches.
This exercise will assist you in developing functional core strength and improving your balance. with a particular focus on the oblique muscles. Because of the additional muscles involved in the movement, the standing variation of the exercise will also help to burn more calories.
This is how to do standing bicycle crunches. Put yourself in a starting position. Relax, stand tall, with feet and shoulder-width apart. Toes must be pointing forward. Put your fingertips behind your neck and your elbows out to the sides. In line with your shoulders Inhale deeply and contract your abdominal muscles.
Raise your right knee across your body as high as you can towards your chest. To feel the crunch, simultaneously twist your torso to the right and draw your left elbow towards the lifted knee. Do not forget to breathe in and out during the movement.
Intermediate
Here are the intermediate steps.
Plank With March
The plank march is a plank variation that incorporates trunk and hip stability anti-rotational elements. Lift one arm and the opposite leg from a plank position. Attempt not to move the rest of your body. Replace and swap. The plank march complicates things by creating instability and forcing the trunk and hips to resist rotation and changing forces. The plank march can be performed at the end of training sessions for 3-5 sets of 10–30 reps, for a set time, or for set work-rest intervals. As an introductory variation, the plank march can be performed by only lifting the legs, and weights can be held in the hands.
Form a forearm plank with your shoulders aligned with your elbows and forearms parallel to the ground. Lift your right foot off the ground, followed by your left foot, as if you were marching. This is one repetition.
Mountain Climbers
Mountain climbers are excellent core exercises because they work your core muscles while also increasing your heart rate. It’s a two-for-one deal. Burn fat while strengthening your core. Furthermore, they work a variety of muscles, from your quads to your shoulders.
In order to perform this exercise, you must put your hands on the ground in a standard plank position. Try to be keen about making sure that your weight is fairly distributed to both your hands and feet. The hands should be shoulder-wide apart and directly beneath the holders. Your abs should be engaged, your back flat, your spine neutral, and the back of your head and neck should be aligned with your back. Your right knee must be close to your chest. As you return to the original position, bring your left knee up to your chest.
Do this alternately for the duration or number of reps specified. To increase the intensity, speed up and do this as quickly as you can. This is great for beginners who can go slow and advanced can go fast to achieve the same core-strengthening and fat-burning effect. It’s an exercise for people of all skill levels.
Elbow to Knee Bird Dog
Position yourself on your hands and knees. Line up your shoulders so that they are directly over your wrists and your hips are directly over your knees. Maintain a straight back, neck, and head. Crunch your elbow and knee together so they meet beneath your body.
Raise your right arm and extend it forward until it is parallel to your torso. As you extend your arm, kick your left leg backward until it is straight and parallel to your torso. Maintain this position for a second. Return to the starting position by crunching your elbow and knee without touching the floor. Repeat as directed on the training plan, then switch legs and arms.
Advance
Here are the advance steps.
Plank Shoulder Taps
When performing a difficult move like plank shoulder taps, proper form is even more important. Proper form not only keeps you safe but also ensures you get the most bang for your buck. Here are the instructions on how to do plank shoulder taps. Put your hands directly under your shoulders and your feet hip-width apart in a high plank position. Maintain a neutral spine, a straight neck and back, and hips that are aligned with your shoulders. Engage your core and squeeze your glutes to keep your body flat and stable. Raise your left hand to tap your right shoulder, then lower it. Raise your right hand to tap your left shoulder, then lower it. Tap the left and right shoulders alternately. For three rounds, aim for 15 taps on each side.
V-Sit
The first letter of the word “v-sit” contains the secret: you should form your body into the letter “V.” The v-sit is a more advanced form of the boat pose, which you may be familiar with from previous yoga or Pilates practice.
This abdominal routine is done while lying face up on a mat on the floor. In this position, neither your arms nor your legs will be touching the floor. Without any adjustments, the whole technique entails extending one’s arms straight in front of oneself, raising one’s back 45 degrees off the floor, and extending one’s legs straight in front of oneself at the same angle. You can form a V by doing so.
You can do the v-sit as a stabilizing exercise by holding it in its extended posture for a certain period of time, or you can do it as a dynamic exercise by moving into and out of it repeatedly. When seated in a held position, maintaining stability requires the greatest concentration because you can easily tip to one side if you let go. In most cases, once you’ve achieved the desired form, you should hold it for a brief length of time before releasing the position and starting over. It’s usual to spend only a few seconds in the V position and perform only a few reps of the exercise at first.
Get set up for success by sitting on the floor before you do anything else. Your toes should be pointed upward and extended in front of you. Contracting your abs as you bring your arms and legs up to a 45-degree angle. It will be crucial all through the relocation process. The importance of correct posture cannot be overstated. In order to accomplish this. Maintaining a good posture as you reach upward is essential for the exercise to be effective. Do not forget to breathe regularly throughout the movement. At the top of the move, you should contact your abs as you lower back to the starting position. Don’t rush things. Be careful as you slowly lean back into the starting position.
Important Reminders
It’s a good idea to consult with a doctor or physical therapist before beginning core exercises to treat a back injury. There should be no pain involved in core exercises. Pain may necessitate modification or cessation of exercise, depending on the situation.
If symptoms persist, it may be necessary to seek additional professional help. If core exercises are being done to improve sports performance or prevent injury, it may be necessary, to begin with, simple exercises before moving on to more difficult ones.
Even if many of the exercises require contracting and holding the muscles in one position, it is important to maintain regular breathing patterns during core strengthening. Not maintaining your breath can hurt your workout because your blood pressure goes up and your muscles get weaker.